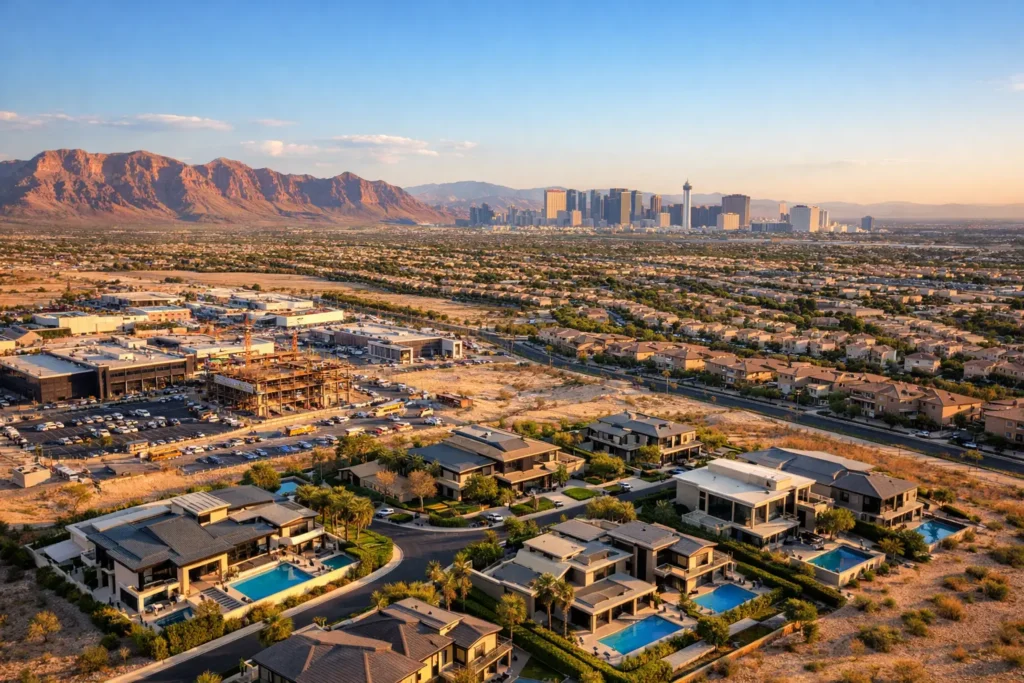
Capturing Amazing Moments with Aerial Photography: A Comprehensive Guide
Aerial photography is an exciting way to capture stunning images from above. With drones and advanced aerial devices, photographers can now access new perspectives that were once completely out of reach. This guide provides essential tips, camera settings, and composition techniques to help you excel in drone photography and create breathtaking visuals.
Key Takeaways
-
Unique Angles: Aerial photography offers high-altitude perspectives that standard ground-level shots cannot replicate.
-
Essential Equipment: Choosing the right drone, camera sensor, and optical lenses is crucial for professional results.
-
Altitude Control: Varying flight height adds depth, texture, and visual interest to your composition.
-
Post-Processing Mastery: Editing is vital for correcting wide-angle lens distortion and maximizing dynamic range.
-
Safety & Compliance: Always adhere to FAA guidelines, local airspace regulations, and drone flight limits.
Understanding the Basics of Aerial Photography
What is Aerial Photography?
Aerial photography is the practice of capturing photographs from an elevated position, typically using unmanned aerial vehicles (UAVs/drones), helicopters, or fixed-wing aircraft. This technique allows photographers to showcase landscapes, architecture, and natural patterns from a bird’s-eye view.
The Evolution of Aerial Photography
Aerial photography has evolved dramatically. Early aerial imagery relied on hot air balloons, kites, and rigged aircraft. Today, modern GPS-guided drones equipped with high-resolution cameras have democratized the medium, making aerial shots accessible to hobbyists and commercial creators alike.
Core Benefits of Drone Photography
-
Unmatched Angles: Showcase scenes in ways impossible to capture from the ground.
-
Detailed Topography: Highlight intricate natural structures, coastal textures, and urban symmetry.
-
Commercial Versatility: Create high-value visuals for real estate, surveying, mapping, and cinema.
Choosing the Right Equipment for Aerial Drone Photography
Selecting the right gear directly impacts image quality, flight stability, and overall reliability in the field.
Essential Cameras and Lenses
-
High-Resolution Sensors: Look for drones offering 1-inch or Micro Four Thirds sensors for superior low-light performance and dynamic range.
-
Wide-Angle Lenses: Ideal for sweeping landscapes and cityscapes.
-
Variable Focal Lengths: Telephoto capabilities let you frame distant subjects without flying too close.
Drone Selection & Specification Comparison
| Drone Model | Camera Resolution | Max Flight Time | Key Feature |
|---|---|---|---|
| DJI Air 3 | 4K / Dual Camera | 46 minutes | Dual-primary camera system |
| DJI Mavic Air 2 | 4K / 48 MP | 34 minutes | Compact & portable design |
| DJI Phantom 4 Pro V2 | 4K / 60 fps | 30 minutes | Mechanical shutter for high-speed tracking |
Essential Aerial Accessories
-
Neutral Density (ND) Filters: Crucial for controlling shutter speed, managing exposure, and reducing glare over water or snow.
-
Extra Intelligent Flight Batteries: Maximize your time in the air during optimal light windows.
-
Propeller Guards & Landing Pads: Protect your craft during launch and landing in rough terrain.
Pro Tip: Always format your MicroSD card and inspect your propellers prior to takeoff to prevent data loss or inflight failure.
Mastering Aerial Photography Techniques & Settings
Optimal Camera Settings for Sharp Aerial Shots
To avoid motion blur caused by drone vibration or wind drift, calibrate your settings prior to launch:
-
Shutter Speed: Keep your shutter speed at 1/500s or faster for crisp stills.
-
Aperture: Aim for a sweet spot between f/2.8 and f/5.6, depending on ambient light and sensor size.
-
ISO: Keep ISO at 100–400 to minimize digital noise.
-
RAW Format: Always shoot in RAW (DNG) to preserve max highlight and shadow detail for post-processing.
How to Stabilize Your Drone in Flight
-
3-Axis Gimbal Calibration: Ensure your motorized gimbal is balanced before every session.
-
Flight Mode Adjustments: Use Cinematic or Tripod mode to slow down stick responsiveness for smoother framing.
-
Weather Awareness: Avoid flying in sustained winds exceeding your drone’s rated wind resistance.
Composition Principles for Aerial Visuals
-
Identify a Clear Focal Point: Look for lone trees, boats, winding roads, or architectural structures.
-
Utilize Leading Lines: Frame rivers, highways, or coastlines to direct the viewer’s eye through the frame.
-
Experiment with Top-Down (90°) Angles: Tilt the camera directly downward to capture abstract patterns, shadows, and textures.
Post-Processing Tips for Drone Photography
Raw aerial files often require post-processing to correct optical flaws and bring out subtle details.
1. Correcting Wide-Angle Lens Distortion
Drone lenses often introduce barrel distortion or chromatic aberration.
-
Enable Profile Corrections in Lightroom or Photoshop.
-
Manually adjust geometry sliders to ensure horizons and buildings remain straight.
2. Enhancing Color, Contrast, and Dynamic Range
-
Dehaze & Clarity: Lightly apply atmospheric dehaze tools to eliminate haze in high-altitude shots.
-
Selective HSL Adjustments: Enhance foliage greens and water blues independently without oversaturating skin tones or clouds.
3. Creating Ultra-Wide Panoramic Images
When wide-angle lenses aren’t enough, shoot a grid of overlapping photos (33% overlap) and use photo-stitching tools to render gigapixel-level panoramic landscapes.
Legal Rules, Safety, and No-Fly Zones
Operating drones responsibly ensures airspace safety and prevents steep legal penalties.
Identifying Airspace Restrictions
Always consult official airspace apps (such as B4UFLY or AirControl) before taking off. Avoid flying near:
-
Airports and helipads
-
Military installations and government facilities
-
National Parks and restricted wildlife reserves
-
Crowded venues, stadiums, and public events
General Altitude & Operating Limits
| Location Zone | Standard Altitude Limit | Key Requirement |
|---|---|---|
| Controlled Airspace | Subject to LAANC Authorization | Pre-approval required |
| Uncontrolled Airspace | 400 feet AGL (Above Ground Level) | Visual Line of Sight (VLOS) |
| Near Obstacles | Within 400 ft of a structure | Must stay below structure height |
How to Build a Professional Aerial Photography Portfolio
An outstanding portfolio displays versatility, technical control, and visual narrative.
-
Curate Selectively: Feature only your top 10–15 images rather than uploading entire flight logs.
-
Show Diversity: Include a balanced mix of urban architecture, natural landscapes, abstract textures, and golden-hour shots.
-
Leverage Online Platforms: Publish high-resolution galleries on custom websites, Instagram, and specialized art directories.
Frequently Asked Questions (FAQ)
What is the best time of day for aerial photography?
The Golden Hour (shortly after sunrise and right before sunset) provides soft light, warm tones, and long, dramatic shadows that highlight terrain contours.
How do I prevent blurry photos when shooting from a drone?
To eliminate motion blur, use a high shutter speed (1/500s+), ensure your 3-axis gimbal is functioning correctly, hover in place when pressing the shutter button, and avoid flying on high-wind days.
Do I need a license to take aerial photos with a drone?
In many regions (such as the US under FAA regulations), flying a commercial drone requires a commercial drone license (e.g., a FAA Part 107 certificate). Recreational flyers must pass basic safety tests (such as TRUST in the US) and comply with altitude restrictions.