Landscape Cinematography with Drones
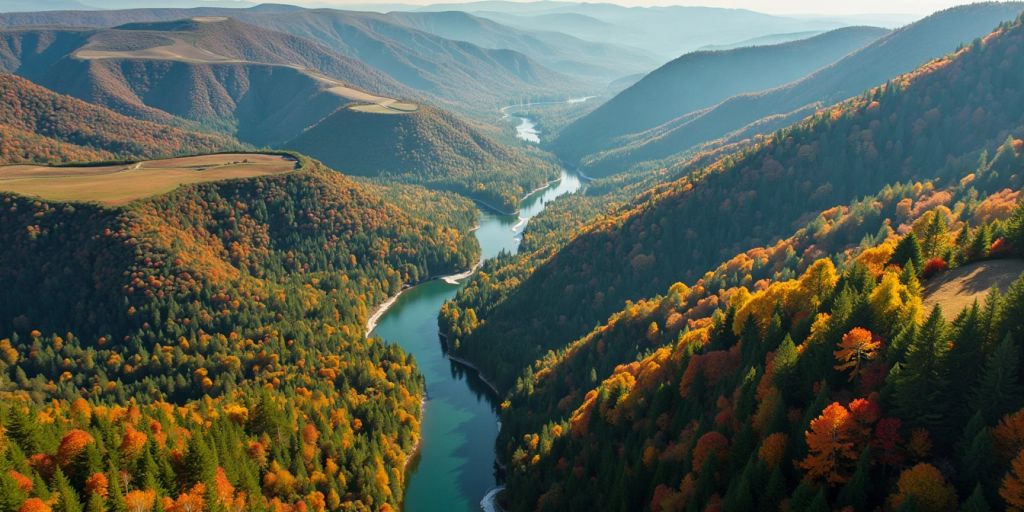
Master Landscape Cinematography with Drones: A Complete Guide
Creating captivating aerial video is about far more than buying the latest tech—it is an art form rooted in story-first visual design. Landscape Cinematography with Drones blends creative camera movement, strategic location planning, and technical mastery to turn ordinary aerial footage into an engaging cinematic narrative.
Whether you’re filming sprawling outdoor vistas, luxury real estate, or indie film sequences, mastering fundamental drone movements and camera settings will immediately elevate the production value of your work.
Key Takeaways
-
Master Core Drone Movements: Learn smooth panning, tilting, and orbiting techniques to add depth to your scenes.
-
Pre-Plan Your Flights: Use location scouting, shot lists, and weather tracking to save time and capture optimal lighting.
-
Leverage Advanced Effects: Implement parallax and dolly zoom shots to create immersive visual storytelling.
-
Optimize Camera Settings: Shoot at 24 fps with a 1/50s shutter speed and a low ISO to maintain cinematic motion blur while keeping imagery crisp.
Mastering Essential Drone Camera Movements
Capturing smooth, intentional footage requires a strong foundation in core drone flight maneuvers:
1. Panning & Rotations
-
Horizontal Panning: Moving the drone horizontally while keeping the subject clear establishes the scale and environment of your scene.
-
360-Degree Point of Interest (POI): Orbiting around a central subject provides a comprehensive view from every angle, creating a strong focal point.
2. Tilting Techniques
-
Moving the drone’s gimbal vertically from a fixed altitude creates dramatic “reveal” shots—perfect for unveiling grand mountain ranges, hidden valleys, or architectural landmarks.
3. Crane & Elevation Shots
-
Descending or ascending vertically while tilting the camera keeps your subject framed while dynamically shifting the viewer’s perspective.
4. Tracking & Close-Ups
-
Flying closer to or farther from a subject adds dynamic layers to your scene, drawing the viewer directly into the story.
Advanced Aerial Techniques for Cinematic Depth
Once you’ve mastered the basics, incorporate these advanced filming techniques to make your videos stand out:
-
The Parallax Effect: Fly your drone sideways while keeping the camera locked on a mid-ground subject. The background appears to move at a different speed than the foreground, instantly adding depth.
-
The Dolly Zoom (Vertigo Effect): Fly backward while simultaneously zooming in on your subject (or vice versa). This keeps the subject the same size in the frame while visually compressing or expanding the background.
-
Golden Hour Lighting: Schedule flights during sunrise or sunset to capture warm, soft natural light, long, dramatic shadows, and rich color contrast.
-
ND Filters: Use Neutral Density (ND) filters to reduce excess light, allowing you to maintain a lower shutter speed in bright conditions.
Drone Cinematography Across Popular Industries
Drone footage isn’t limited to nature documentaries; it offers high-value applications across multiple visual sectors:
| Industry | Primary Drone Application | Key Visual Benefit |
| Real Estate | Aerial property tours & neighborhood highlights | Establishes property layout and land boundaries |
| Weddings | Dramatic venue establishing shots & outdoor ceremonies | Captures emotional moments from unique overhead angles |
| Indie Film | Dynamic action sequences & cinematic transition shots | Delivers high-budget visual scale on an indie budget |
| Tourism & Travel | Sweeping landscape reveals & resort promotional videos | Engages audiences with immersive destination footage |
Planning and Executing Your Aerial Shots
Great aerial cinematography is prepared on the ground long before takeoff. Follow this pre-flight checklist:
-
Scout Locations Ahead of Time: Identify obstacle risks (power lines, dense trees) and map out potential flight paths.
-
Build a Shot List & Storyboard: Outline the camera movements you need to capture vital footage on location.
-
Monitor Weather & Solar Angles: Track wind speed, cloud cover, and the golden hour to maximize lighting quality and flight safety.
Creative Overhead Angles to Try
To keep your edit visually engaging, mix up your camera angles:
-
The Bird’s-Eye Top-Down Shot: Point the camera straight down (90°) to capture unique textures, patterns, and geometric lines in the landscape below.
-
Low-Angle Tracking: Fly low to the ground while tilting slightly upward to emphasize speed, motion, and scale.
-
Reveal Flights: Fly through natural gaps—such as tree canopies or rock formations—to reveal a sprawling landscape on the other side.
Recommended Drone Camera Settings
To achieve that soft, natural “film look,” configure your manual camera settings based on standard cinematic rules:
| Setting | Recommended Value | Cinematic Purpose |
| Frame Rate | 24 fps (or 30 fps) | Standard frame rate for natural motion look |
| Shutter Speed | 1/50s (at 24 fps) | Adheres to the 180° shutter rule for realistic motion blur |
| ISO | 100 – 400 | Keeps image grain and sensor noise to a minimum |
| Aperture | f/2.8 – f/8 | Adjusts depth of field and balances overall exposure |
| White Balance | Manual (5500K for Sunlight) | Prevents mid-flight color shifting |
Major Benefits of Using Drones for Landscape Video
-
Cost Efficiency: Replaces expensive helicopter rentals and heavy crane rigs with compact, budget-friendly equipment.
-
Unmatched Flexibility: Accesses remote or dangerous locations—like cliffsides, rivers, and high peaks—without putting crew members at risk.
-
Higher Production Value: Instantly elevates marketing campaigns, films, and video projects with high-end cinematic visuals.
Final Thoughts
Mastering landscape cinematography with drones is a blend of flight precision, storytelling intuition, and technical camera knowledge. By practicing smooth maneuvers, planning your flight paths, and optimizing your camera settings, you can capture breathtaking aerial footage that leaves a lasting impression on your audience.
Popular Posts
September 02, 2026
September 01, 2026
August 31, 2026
August 30, 2026
August 29, 2026
August 28, 2026
Comments are closed.